DIY Pumpkin Carving Ideas – Get ready to impress your neighborhood this Halloween with fun, creative, and easy-to-make pumpkin designs that look professional but are completely beginner-friendly.

Why DIY Pumpkin Carving is So Fun
There’s something magical about turning a plain pumpkin into a glowing masterpiece. With the right pumpkin carving ideas, you can express creativity, involve the kids, and decorate your home with a cozy Halloween vibe. You don’t need fancy tools or artistic skills — just patience, imagination, and a few helpful tips. Whether you’re aiming for a spooky grin, a cute cat face, or something trendy, the process is always rewarding and fun.

10 Creative DIY Pumpkin Carving Ideas
- Classic Jack-O’-Lantern: The timeless design with triangle eyes and a toothy smile.
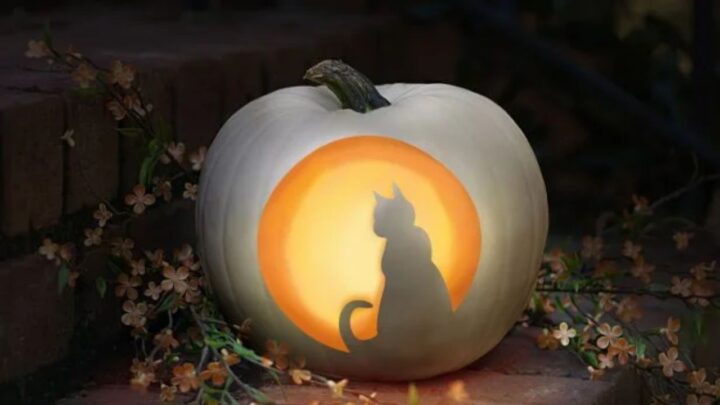
- Cat Silhouette Pumpkin: Perfect for animal lovers — carve a simple cat outline with glowing eyes.
- Haunted House Scene: Use a stencil to carve a spooky house and bats.
- Moon and Stars Design: Ideal for a subtle, elegant look using circular cutouts.
- Toothpick Monsters: Add quirky teeth made from toothpicks for a funny twist.
- Polka Dot Pumpkins: Use a drill to create evenly spaced dots that shine beautifully at night.
- Ghostly Glow Pumpkin: Carve a ghost face and use a color-changing LED light inside.
- Leaf Pattern Pumpkin: Trace real leaves for a rustic, autumn-inspired design.
- Emoji Faces: Modern and easy — carve your favorite emoji expressions.
- Stacked Pumpkins: Combine small pumpkins for a tiered look, each with a different expression.

Step-by-Step Guide to DIY Pumpkin Carving
- Step 1: Pick the Right Pumpkin
Choose a firm, evenly shaped pumpkin with a flat base. Avoid any with soft spots or bruises. A clean, healthy pumpkin makes carving easier and helps your creation last longer.

- Step 2: Gather Your Tools
You’ll need a carving knife, spoon or scoop, marker, and a bowl for seeds. For intricate designs, small saws or pumpkin-carving kits are excellent additions.
- Step 3: Cut and Clean
Draw a circle around the stem and cut off the top like a lid. Scoop out all the seeds and stringy bits. The cleaner the inside, the better your light will shine through.
- Step 4: Draw Your Design
Use a washable marker to sketch your idea. You can also print and tape stencils onto the pumpkin to trace outlines for cleaner shapes.
- Step 5: Carve Slowly and Carefully
Always carve from the center outward. Take your time, especially around detailed edges. Use a gentle sawing motion to avoid cracks or breaks.
- Step 6: Light It Up
Place a tea light candle or LED light inside and put the lid back on. Dim your room lights to admire the glowing effect — it’s pure Halloween magic!

Extra Tips for Perfect Pumpkin Carving
- Chill your pumpkin before carving — it cuts cleaner.
- Rub petroleum jelly on edges to prevent drying.
- Use battery-powered candles for safety.
- Sprinkle cinnamon inside for a festive scent.
- Save the seeds — roast them for a healthy snack!
FAQs
How long do carved pumpkins last?
Carved pumpkins usually last 4–7 days, depending on temperature and humidity. Keep them cool to extend freshness.
Can I use paint instead of carving?
Absolutely! Painting is a mess-free alternative and great for kids. You can even mix painting and carving for creative designs.
What type of light works best inside a pumpkin?
LED lights or battery-powered candles are best — they’re bright, safe, and reusable compared to real candles.
How do I stop mold from forming?
Spray the inside with a vinegar and water mix or use bleach water. It helps prevent mold and extends the pumpkin’s life.

Now that you know the secrets of DIY pumpkin carving, grab your tools, call your friends or family, and get creative! The joy of seeing your pumpkin light up the night — knowing you made it yourself — is a feeling you’ll never forget.